
NSDT工具推荐: Three.js AI纹理开发包 - YOLO合成数据生成器 - GLTF/GLB在线编辑 - 3D模型格式在线转换 - 可编程3D场景编辑器 - REVIT导出3D模型插件 - 3D模型语义搜索引擎 - Three.js虚拟轴心开发包 - 3D模型在线减面 - STL模型在线切割
在此示例中,我们将创建一个非常简单的 Web 应用程序,该应用程序能够:
- 通过 Speckle 服务器 OAuth 验证用户。
- 搜索用户可用的流。
- 显示与给定流关联的提交数据。
- 筛选要显示的数据。
- 在 localStorage 中缓存以便在页面重新加载时记住应用程序状态。
让我们开始吧! 🚀
1、前置要求
本指南适用于任何平台 (Mac/Linux/Windows)。 我们将使用 VSCode 作为我们的 IDE,但你可以使用任何其他 IDE。
你还需要安装 Node 和 vue-cli,并对 Vue 的工作原理有一些基本的了解。
安装开发环境:
- Node :安装Node.js的最简单方法可能是通过 nvm。 在 Windows 上,你可以使用这个指南。 如果在 OSX 上,你可以使用原始的 nvm 。
- Vue CLI:安装 node 后,只需运行
npm install -g @vue/cli即可。
2、设置 Vue 应用程序
这是最简单的步骤。 打开一个新终端,将当前目录设置为你希望项目所在的位置,然后运行以下命令:
vue create speckle-demo-app这会问你一些问题,比如使用的 vue 版本,安装什么插件等。正确回答问题很重要,否则,你的项目可能会缺少一些关键功能。
完成后,你的 Vue 项目就准备好了。 要在 VSCode 中打开项目,我们只需要运行:
code speckle-demo-app我们的 UI还将使用 Vuetify 让我们的生活更轻松,因为它有许多有用的组件。 要添加Vuetify,可以运行:
vue add vuetify
当询问预设时,选择默认。
我们还需要添加一些方便的依赖项,例如用于状态存储的 vuex-persist,用于显示用户友好日期和去抖动的 vue2-timeago。 为此,运行以下命令:
npm i vuex-persist vue2-timeago debounce
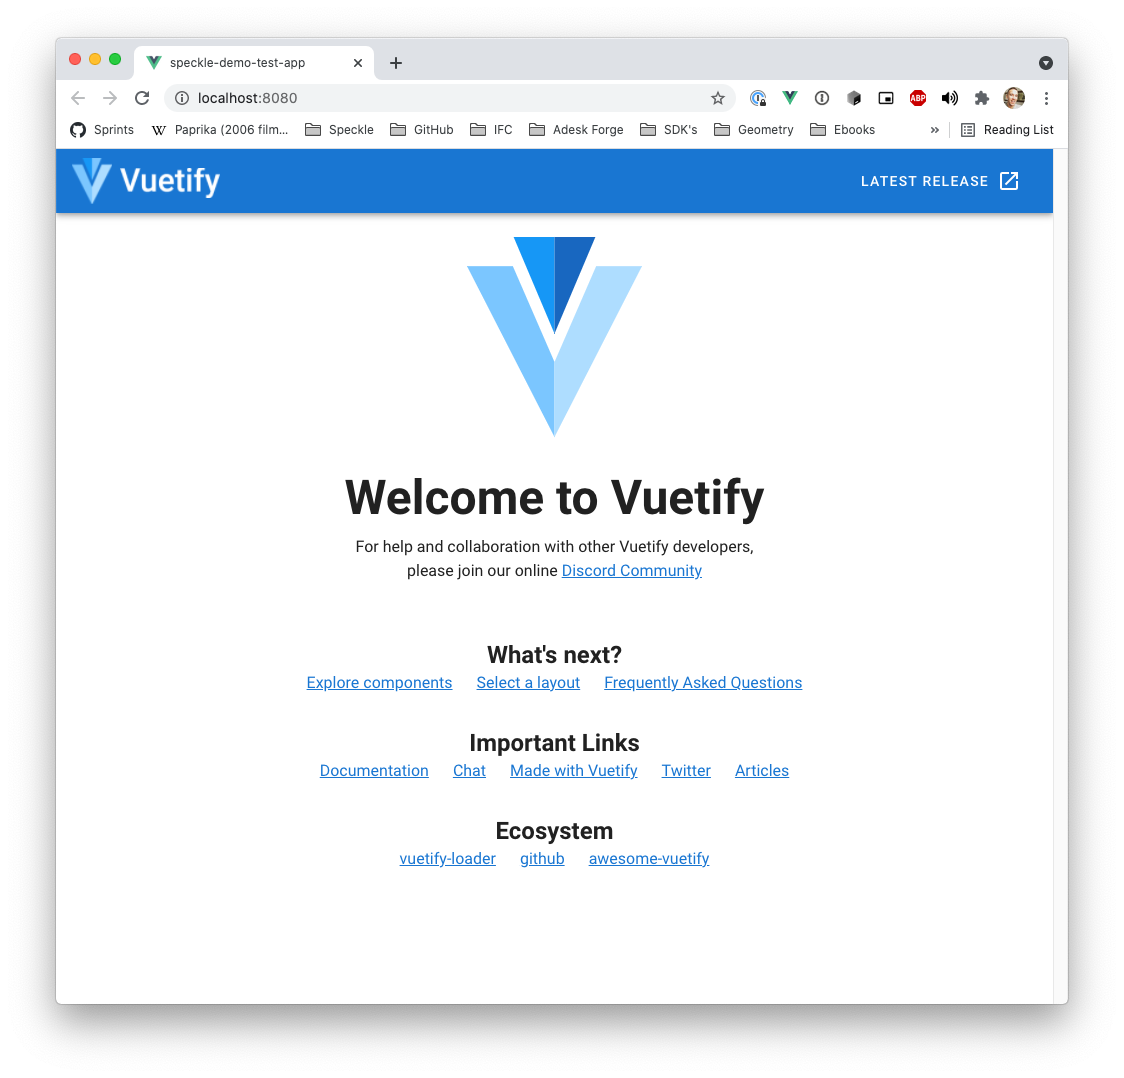
如果一切顺利,运行以下命令应该可以使应用程序在 http://localhost:8080上可用。
npm run serve在 chrome 中,看起来应该是这样的:
3、身份验证
为方便起见,我们将所有与Speckle相关的代码隔离到 2 个文件中:
- src/speckleQueries.js 将包含一些实用函数来构建我们的 GraphQL 查询。
- src/speckleUtils.js 将保存所有对 Speckle 服务器的调用,以及一些常量。 它还将处理登录/注销功能。
3、注册应用程序
为了能够与 Speckle 服务器对话,我们首先需要使用现有帐户在该服务器中创建一个应用程序。 为此,请访问服务器的前端,使用帐户登录并访问个人资料页面。
向下滚动直到看到“应用程序”部分,然后按“新建应用程序”按钮。 应出现一个弹出窗口,按如下方式填写:
- 名称: SpeckleDemoApp
- 范围:
stream:read,profile:read,profile:email - 重定向网址:
http://localhost:8080 - 描述:我的第一个Speckle应用
一旦被接受,就可以看到 App Id 和 App Secret,以及我们应该使用的 url 模式的指示 : https://3dx.nsdt.cloud/authn/verify/{appId}/{challenge}。
警告:请注意,重定向 url 指向我们的本地计算机网络。 将此应用程序部署到像 Netlify 这样的服务时,我们必须创建一个新的指向正确的 Netlify url。
App Id 和 App Secret 用于识别你的应用程序,因此永远不应将它们添加到版本控制中。 相反,我们将使用 ENV 变量来保存该信息,这也允许我们在不同的场景(开发/生产)中修改它。
提示:与 Speckle Server 集成的前端应用程序被视为 OAuth 公共应用程序,因为它们无法保证其 ID 和秘密的安全。
Vue 会自动读取项目根目录中的任何 .env 文件并相应地加载变量,但也会在编译时将所有引用替换为变量的实际值(我们不希望这样)。 我们可以通过创建一个名为 .env.local 的文件来告诉 vue.js 不要这样做。 内容应该是这样的👇🏼(记得适当替换你的ID和Secret)。
# The Speckle Application Id
VUE_APP_SPECKLE_ID=YOUR_APP_ID

# The Speckle Application Secret
VUE_APP_SPECKLE_SECRET=YOUR_APP_SECRET

VUE_APP_SERVER_URL=https://speckle.xyz
VUE_APP_SPECKLE_NAME="Speckle Demo App"
4、使用Speckle登录
使用 Speckle Server 的 auth 流程的简化版本可以总结如下:
- 用户点击登录按钮
- 用户被重定向到 Speckle 服务器中的授权页面(在创建应用程序时使用提供的 url 模式)
- 用户将登录并允许该应用程序访问他的数据。
- 用户被重定向到我们指定的重定向 URL,并附有
access_code。 - 使用这个
access_code,我们可以将其交换为一对令牌/刷新令牌,这允许应用程序作为该用户与服务器“对话”。 我们将把它们保存在localStorage中。
这听起来可能相当复杂,但它归结为 2 种不同的交互(重定向你的用户并交换访问代码)。
- 将 auth 函数添加到 speckleUtils.js。
在我们的 src/speckleUtils.js 文件中,粘贴以下代码。 你会发现一些引用我们之前设置的 ENV 变量的常量,以及几个函数。
- goToSpeckleAuthPage:将生成一个随机挑战,将其保存在 localStorage 中,并将 url 定向到指定 speckle 服务器中的 auth 页面。
- exchangeAccessCode:将从服务器获取一对新的令牌/刷新令牌并清除挑战。
speckleLogOut:将从 localStorage 中删除所有必要的数据。
export const APP_NAME = process.env.VUE_APP_SPECKLE_NAME
export const SERVER_URL = process.env.VUE_APP_SERVER_URL
export const TOKEN = `${APP_NAME}.AuthToken`
export const REFRESH_TOKEN = `${APP_NAME}.RefreshToken`
export const CHALLENGE = `${APP_NAME}.Challenge`

// Redirects to the Speckle server authentication page, using a randomly generated challenge. Challenge will be stored to compare with when exchanging the access code.
export function goToSpeckleAuthPage() {
  // Generate random challenge
  var challenge =
    Math.random()
      .toString(36)
      .substring(2, 15) +
    Math.random()
      .toString(36)
      .substring(2, 15)
  // Save challenge in localStorage
  localStorage.setItem(CHALLENGE, challenge)
  // Send user to auth page
  window.location = `${SERVER_URL}/authn/verify/${process.env.VUE_APP_SPECKLE_ID}/${challenge}`
}

// Log out the current user. This removes the token/refreshToken pair.
export function speckleLogOut() {
  // Remove both token and refreshToken from localStorage
  localStorage.removeItem(TOKEN)
  localStorage.removeItem(REFRESH_TOKEN)
}

// Exchanges the provided access code with a token/refreshToken pair, and saves them to local storage.
export async function exchangeAccessCode(accessCode) {
  var res = await fetch(`${SERVER_URL}/auth/token/`, {
    method: "POST",
    headers: {
      "Content-Type": "application/json"
    },
    body: JSON.stringify({
      accessCode: accessCode,
      appId: process.env.VUE_APP_SPECKLE_ID,
      appSecret: process.env.VUE_APP_SPECKLE_SECRET,
      challenge: localStorage.getItem(CHALLENGE)
    })
  })
  var data = await res.json()
  if (data.token) {
    // If retrieving the token was successful, remove challenge and set the new token and refresh token
    localStorage.removeItem(CHALLENGE)
    localStorage.setItem(TOKEN, data.token)
    localStorage.setItem(REFRESH_TOKEN, data.refreshToken)
  }
  return data
}- 链接到 vuex
由于我们使用 vuex 来管理应用程序的状态,因此我们还将添加重定向、交换和注销逻辑作为操作。 然后我们可以在我们的任何应用程序组件中调用它们。
将文件 src/store/index.js 的内容替换为以下内容:
import Vue from "vue"
import Vuex from "vuex"

import {
  exchangeAccessCode,
  getUserData,
  goToSpeckleAuthPage,
  speckleLogOut
} from "@/speckleUtils"

Vue.use(Vuex)

export default new Vuex.Store({
  state: {},
  getters: {},
  mutations: {},
  actions: {
    logout(context) {
      // Wipe the state

      // Wipe the tokens
      speckleLogOut()
    },
    exchangeAccessCode(context, accessCode) {
      // Here, we could save the tokens to the store if necessary.
      return exchangeAccessCode(accessCode)
    },
    redirectToAuth() {
      // Use the speckleUtils redirect logic
      goToSpeckleAuthPage()
    }
  },
  modules: {}
})
我们现在可以通过调用 this.$store.dispatch(ACTION_NAME, ...params) 在任何组件中使用这些操作。
- 添加登录/注销按钮
在你的 App.vue 文件中,将其内容替换为以下内容:
<template lang="html">
  <v-app>
    <v-app-bar app color="primary" dark>
      <div class="d-flex align-center">
        <v-img
          alt="Speckle Logo"
          class="shrink mr-2"
          contain
          :src="require(`@/assets/img.png`)"
          transition="scale-transition"
          width="40"
          height="24"
        />
        <h3>SPECKLE DEMO APP</h3>
      </div>

      <v-spacer></v-spacer>

      <v-btn
        outlined
        v-if="!isAuthenticated"
        @click="$store.dispatch('redirectToAuth')"
      >
        <span>Login with Speckle</span>
      </v-btn>
      <v-btn outlined v-else @click="$store.dispatch('logout')">
        Log out
      </v-btn>
    </v-app-bar>

    <v-main>
      <!-- <router-view /> -->
    </v-main>
  </v-app>
</template>

<script>
export default {
  name: "App",
  computed: {
    isAuthenticated() {
      return false
    }
  }
}
</script>
请注意,有一个 isAuthenticated 计算属性目前默认为 false(我们稍后会更新它)。 还有一对链接到此布尔值的 v-btn 按钮。 当没有用户通过身份验证时,我们将显示登录按钮,当有用户通过身份验证时,我们将显示注销按钮。
每个都绑定到我们之前创建的store中的操作。
<v-btn
outlined
v-if="!isAuthenticated"
@click="$store.dispatch('redirectToAuth')"
>
<span>Login with Speckle</span>
</v-btn>
<v-btn outlined v-else @click="$store.dispatch('logout')">
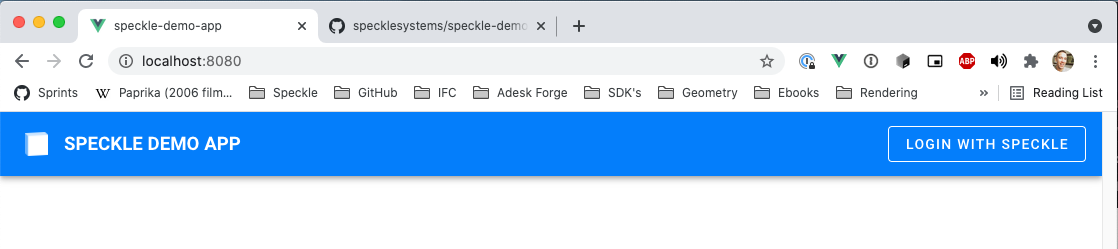
Log out
</v-btn>此时,你的应用程序应该只显示一个带有标题和登录按钮的菜单栏。
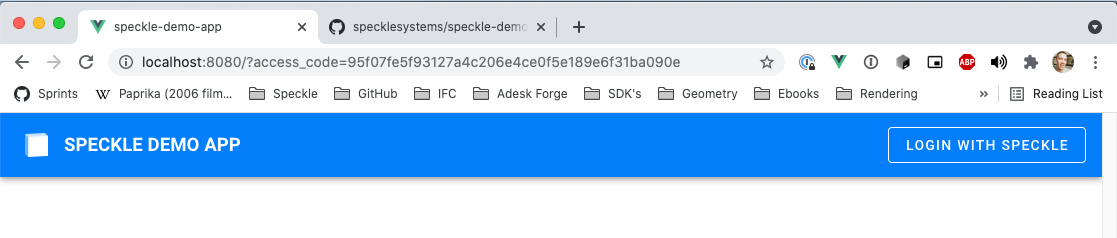
现在按登录按钮,按照服务器中的步骤操作,并允许该应用访问你的数据。 这会将你带回 http://localhost:8080。 但请注意,该 url 现在将包含查询参数 ?access_code=YOUR_ACCESS_CODE,我们现在可以编辑我们的 src/router/index.js 文件,以便在找到访问代码时交换访问代码。
- 交换access_code
为了在 url 中提供访问代码时自动交换访问代码,我们将使用 vue-router 的功能之一。 vue-router 是在你的应用程序中处理 url 路由的插件,它还会解析查询值和 url 参数,因此你不必这样做。
我们可以实现一个 beforeEach 处理程序,这将允许我们在每个页面加载到我们的应用程序之前运行一些代码。 此时,我们将检查它是否包含访问代码,如果包含,则交换它。
打开你的 src/router/index.js 文件并将此代码添加到 export default router 行的正上方。
// This import can go at the top of the file
import store from '@/store'

router.beforeEach(async (to, from, next) => {
  if (to.query.access_code) {
    // If the route contains an access code, exchange it
    try {
      await store.dispatch("exchangeAccessCode", to.query.access_code)
    } catch (err) {
      console.warn("exchange failed", err)
    }
    // Whatever happens, go home.
    next("/")
  }
})
现在,再次按下登录按钮,允许该应用程序访问你的帐户并等待重定向到该应用程序。 完成后,你应该在 localStorage 中存储了 2 个变量: Speckle Demo App.AuthToken 和 Speckle Demo App.RefreshToken 。
现在我们已经设法保存了我们的身份验证令牌,但我们的应用程序仍然无法辨别你的用户是否已通过身份验证(记住 App.vue 中的 isAuthenticated 计算属性)。 我们将在下一步添加它。
5、获取用户数据
为了让应用知道用户是谁,它需要获取用户的数据。 获取和存储此数据的最佳位置是在我们的store中。
- 用户数据查询
将以下函数添加到我们的 speckleQueries.js 文件中。 这是将获取用户和服务器信息的 graphQL 查询。
export const userInfoQuery = () => `query {
      user {
        name
      },
      serverInfo {
        name
        company
      }
    }`
将其添加到 src/speckleUtils.js 文件中。 请记住导入 userInfoQuery。
import { userInfoQuery } from "@/speckleQueries"

// Calls the GraphQL endpoint of the Speckle server with a specific query.
export async function speckleFetch(query) {
  let token = localStorage.getItem(TOKEN)
  if (token)
    try {
      var res = await fetch(`${SERVER_URL}/graphql`, {
        method: "POST",
        headers: {
          Authorization: "Bearer " + token,
          "Content-Type": "application/json"
        },
        body: JSON.stringify({
          query: query
        })
      })
      return await res.json()
    } catch (err) {
      console.error("API call failed", err)
    }
  else return Promise.reject("You are not logged in (token does not exist)")
}

// Fetch the current user data using the userInfoQuery
export const getUserData = () => speckleFetch(userInfoQuery())- 修改应用商店
用以下代码替换 src/store/index.js 的内容:
import Vue from "vue"
import Vuex from "vuex"

import {
  exchangeAccessCode,
  getStreamCommits,
  getUserData,
  goToSpeckleAuthPage,
  speckleLogOut
} from "@/speckleUtils"

Vue.use(Vuex)

export default new Vuex.Store({
  state: {
    user: null,
    serverInfo: null
  },
  getters: {
    isAuthenticated: state => state.user != null
  },
  mutations: {
    setUser(state, user) {
      state.user = user
    },
    setServerInfo(state, info) {
      state.serverInfo = info
    }
  },
  actions: {
    logout(context) {
      // Wipe the state
      context.commit("setUser", null)
      context.commit("setServerInfo", null)
      // Wipe the tokens
      speckleLogOut()
    },
    exchangeAccessCode(context, accessCode) {
      // Here, we could save the tokens to the store if necessary.
      return exchangeAccessCode(accessCode)
    },
    async getUser(context) {
      try {
        var json = await getUserData()
        var data = json.data
        context.commit("setUser", data.user)
        context.commit("setServerInfo", data.serverInfo)
      } catch (err) {
        console.error(err)
      }
    },
    redirectToAuth() {
      goToSpeckleAuthPage()
    }
  },
  modules: {}
})- 更新 App.vue
现在,在 App.vue 文件中,修改 isAuthenticated 计算属性,如下所示:
    isAuthenticated() {
      return this.$store.getters.isAuthenticated
    }
此外,在模板部分,在登录/注销按钮顶部添加以下内容:
<div v-if="isAuthenticated">
  Welcome
  <b>{{ $store.state.user.name }}</b>
  ! You are connected to
  <b>
    {{ $store.state.serverInfo.company }}'s
    <em>{{ $store.state.serverInfo.name }}</em>
  </b>
</div>

<v-spacer></v-spacer>- 更新 router.beforeEach
唯一剩下要做的就是告诉路由器在每次页面更改时检查用户。 为此,通过在我们之前的条件中添加一个 else 子句来修改 beforeEach 实现:
router.beforeEach(async (to, from, next) => {
  if (to.query.access_code) {
    // If the route contains an access code, exchange it
    try {
      await store.dispatch("exchangeAccessCode", to.query.access_code)
    } catch (err) {
      console.warn("exchange failed", err)
    }
    // Whatever happens, go home.
    next("/")
  } else {
    try {
      // Check on every route change if you still have access.
      var goto = await store.dispatch("getUser")
      next(goto)
    } catch (err) {
      next("/")
    }
  }
})
这样应该就可以了! 现在,如果你刷新页面,应该会看到一条欢迎消息,其中包含你的用户名和所连接的服务器名称,以及“注销”按钮:

6、搜索流
现在我们可以在应用程序中访问我们的用户和服务器数据,并且还可以区分用户何时登录,我们可以开始从我们的服务器获取其他信息。 让我们从流搜索字段开始。 选定的流也将存储在 vuex 中,因此我们还将向其添加适当的状态道具、方法和操作。
- 搜索查询
首先将以下函数添加到我们的 speckleQueries.js:
export const streamSearchQuery = search => `query {
      streams(query: "${search}") {
        totalCount
        cursor
        items {
          id
          name
          updatedAt
        }
      }
    }`
然后将以下函数添加到 speckleUtils.js。 我们将使用它在我们的 SpeckleSearch 组件中获取搜索结果(以下 2 个步骤):
// Update the import to include the streamSearchQuery
import { userInfoQuery, streamSearchQuery } from "@/speckleQueries"

export const searchStreams = e => speckleFetch(streamSearchQuery(e))- 修改store
修改 src/store/index.js,如以下代码块所示。 我们刚刚向状态添加了一个 currentStream 属性、一个 setCurrentStream 修改和两个操作 handleStreamSelection 和 clearStreamSelection。 这将允许我们将用户选择保存在我们的应用程序状态中。
import Vue from "vue"
import Vuex from "vuex"

import {
  exchangeAccessCode,
  getUserData,
  goToSpeckleAuthPage,
  speckleLogOut
} from "@/speckleUtils"

Vue.use(Vuex)

export default new Vuex.Store({
  state: {
    user: null,
    serverInfo: null,
    currentStream: null,
  },
  getters: {
    isAuthenticated: state => state.user != null
  },
  mutations: {
    setUser(state, user) {
      state.user = user
    },
    setServerInfo(state, info) {
      state.serverInfo = info
    },
    setCurrentStream(state, stream) {
      state.currentStream = stream
    }
  },
  actions: {
    logout(context) {
      // Wipe the state
      context.commit("setUser", null)
      context.commit("setServerInfo", null)
      context.commit("setCurrentStream", null)
      // Wipe the tokens
      speckleLogOut()
    },
    exchangeAccessCode(context, accessCode) {
      // Here, we could save the tokens to the store if necessary.
      return exchangeAccessCode(accessCode)
    },
    async getUser(context) {
      try {
        var json = await getUserData()
        var data = json.data
        context.commit("setUser", data.user)
        context.commit("setServerInfo", data.serverInfo)
      } catch (err) {
        console.error(err)
      }
    },
    redirectToAuth() {
      goToSpeckleAuthPage()
    },
    handleStreamSelection(context, stream) {
      context.commit("setCurrentStream", stream)
    },
    clearStreamSelection(context) {
      context.commit("setCurrentStream", null)
    }
  },
  modules: {}
})- 创建子组件
现在我们将创建一个名为 StreamSearch.vue 的新组件来在一个地方处理所有搜索 UI:
<template>
  <v-autocomplete
    v-model="selectedSearchResult"
    :items="streams.items"
    :search-input.sync="search"
    no-filter
    counter="2"
    rounded
    filled
    dense
    flat
    hide-no-data
    hide-details
    placeholder="Streams Search"
    item-text="name"
    item-value="id"
    return-object
    clearable
    append-icon=""
    @update:search-input="debounceInput"
  >
    <template #item="{ item }">
      <v-list-item-content>
        <v-list-item-title>
          <v-row class="pa-0 ma-0">
            {{ item.name }}
            <v-spacer></v-spacer>
            <span class="streamid">{{ item.id }}</span>
          </v-row>
        </v-list-item-title>
        <v-list-item-subtitle class="caption">
          Updated
          <time-ago :datetime="item.updatedAt"></time-ago>
        </v-list-item-subtitle>
      </v-list-item-content>
    </template>
  </v-autocomplete>
</template>

<script>
import { debounce } from "debounce"
import { searchStreams } from "@/speckleUtils"
import { TimeAgo } from 'vue2-timeago'

export default {
  name: "StreamSearch",
  data: () => ({
    search: "",
    streams: { items: [] },
    selectedSearchResult: null
  }),
  components: { TimeAgo },
  watch: {
    selectedSearchResult(val) {
      this.search = ""
      this.streams.items = []
      if (val) this.$emit("selected", val)
    }
  },
  methods: {
    async fetchSearchResults(e) {
      if (!e || e?.length < 3) return
      var json = await searchStreams(e)
      this.streams = json.data.streams
    },
    debounceInput: debounce(function(e) {
      this.fetchSearchResults(e)
    }, 300)
  }
}
</script>

<style scoped></style>
再创建一个简单的 WelcomeView.vue 以显示给我们未经过身份验证的用户。
<template lang="html">
  <v-container
    fill-height
    fluid
    class="home flex-column justify-center align-center primary--text"
  >
    <h1>Welcome to the Speckle Demo App!</h1>
    <h3>This app part of our developer guides</h3>
    <p>Please log in to access you Speckle data.</p>
  </v-container>
</template>
<script>
export default {
  name: "WelcomeView"
}
</script>- 更新 Home.vue
修改 Home.vue 视图:
<template lang="html">
  <WelcomeView v-if="!$store.getters.isAuthenticated" />
  <v-container v-else class="home pa-6">
    <stream-search
      @selected="$store.dispatch('handleStreamSelection', $event)"
    />
    <h2 class="pt-6 primary--text">
      <span v-if="selectedStream">
        {{ selectedStream.name }} — {{ selectedStream.id }}
        <v-btn
          outlined
          text
          small
          class="ml-3"
          :href="serverUrl + '/streams/' + selectedStream.id"
        >
          View in server
        </v-btn>
        <v-btn
          outlined
          text
          small
          class="ml-3"
          color="error"
          @click="$store.dispatch('clearStreamSelection')"
        >
          Clear selection
        </v-btn>
      </span>
      <span v-else>
        <em>No stream selected. Find one using the search bar 👆🏼</em>
      </span>
    </h2>
  </v-container>
</template>

<script>
import StreamSearch from "@/components/StreamSearch"
import WelcomeView from "@/views/WelcomeView"

export default {
  name: "HomeView",
  components: { WelcomeView, StreamSearch },
  data: () => {
    return {
      serverUrl: process.env.VUE_APP_SERVER_URL
    }
  },
  methods: {},
  computed: {
    selectedStream: function() {
      return this.$store.state.currentStream
    }
  }
}
</script>
- 更新 App.vue
在 App.vue 中有一个引用 <router-view/> 的注释行。 取消注释。
- 预览结果
进行这些更改后,你的应用程序应在未登录时显示欢迎消息,并在登录时显示搜索栏和选择文本。
在搜索栏中引入一些文本应该会在下拉列表中显示结果列表。 选择其中一个结果项会将选择文本从未选择流更改为显示所选流名称和 ID,以及 2 个按钮。 第一个将带你进入服务器中的流页面,而第二个将在应用程序状态下清除选择。
7、显示流提交
到目前为止,我们已经设法通过我们的 Speckle 服务器进行身份验证,获取用户和服务器信息并搜索可用的流,以及将结果存储在我们的应用程序状态中。
现在,让我们使用我们的 selectedStream 来显示一个表,其中包含所有提交,以及与每个提交相关的一些数据。 由于提交列表可能相当大,我们将向表中添加基本的分页功能。
为此,我们需要获取与流关联的提交数据,修改我们的 store/index.js 以保存新数据,并在 Home.vue 上添加一个带有列过滤器的表视图
- 创建获取查询
让我们从向我们的 speckleQueries.js 添加一个新的查询函数开始:
export const streamCommitsQuery = (streamId, itemsPerPage, cursor) => `query {
    stream(id: "${streamId}"){
      commits(limit: ${itemsPerPage}, cursor: ${
  cursor ? '"' + cursor + '"' : null
}) {
        totalCount
        cursor
        items{
          id
          message
          branchName
          sourceApplication
          referencedObject
          authorName
          createdAt
        }
      }
    }
  }`
并将以下内容添加到 speckleUtils.js(记得导入 streamCommitsQuery):
export const getStreamCommits = (streamId, itemsPerPage, cursor) =>
  speckleFetch(streamCommitsQuery(streamId, itemsPerPage, cursor))
请注意,查询有一个游标。 这用于获取提交列表的连续页面。 游标有一个当前限制,因为它只允许在页面中前进,而不是后退。 为了解决这个问题,我们将在我们的store中跟踪这些值,以便我们可以进行分页(我们还将保持 itemsPerPage 值固定以使事情简单)。
- 更新store/index.js
现在,store/index.js 文件中有相当多的修改。 我已经突出显示了代码块中的更改,但您可以随意替换下面的全部内容。
我们基本上需要修改状态才能:
- 存储 latestCommits 数据、previousCursors 列表和表可视化的 tableOptions 列表。
- 添加mutations以单独修改这些状态属性中的每一个。请注意,previousCursors 是一个列表,因此我们添加了两个突变:一个用于推送新值,另一个用于替换整个列表。
- 添加 getCommits 操作,并更新 logout、handleStreamSelection 和 clearStreamSelection 以处理这些新属性。
import Vue from "vue"
import Vuex from "vuex"

import {
  APP_NAME,
  exchangeAccessCode,
  getStreamCommits,
  getUserData,
  goToSpeckleAuthPage,
  speckleLogOut
} from "@/speckleUtils"

Vue.use(Vuex)

export default new Vuex.Store({
  state: {
    user: null,
    serverInfo: null,
    currentStream: null,
    latestCommits: null,
    previousCursors: [null],
    tableOptions: null
  },
  getters: {
    isAuthenticated: state => state.user != null
  },
  mutations: {
    setUser(state, user) {
      state.user = user
    },
    setServerInfo(state, info) {
      state.serverInfo = info
    },
    setCurrentStream(state, stream) {
      state.currentStream = stream
    },
    setCommits(state, commits) {
      state.latestCommits = commits
    },
    setTableOptions(state, options) {
      state.tableOptions = options
    },
    resetPrevCursors(state) {
      state.previousCursors = [null]
    },
    addCursorToPreviousList(state, cursor) {
      state.previousCursors.push(cursor)
    }
  },
  actions: {
    logout(context) {
      // Wipe the state
      context.commit("setUser", null)
      context.commit("setServerInfo", null)
      context.commit("setCurrentStream", null)
      context.commit("setCommits", null)
      context.commit("setTableOptions", null)
      context.commit("resetPrevCursors")
      // Wipe the tokens
      speckleLogOut()
    },
    exchangeAccessCode(context, accessCode) {
      // Here, we could save the tokens to the store if necessary.
      return exchangeAccessCode(accessCode)
    },
    async getUser(context) {
      try {
        var json = await getUserData()
        var data = json.data
        context.commit("setUser", data.user)
        context.commit("setServerInfo", data.serverInfo)
      } catch (err) {
        console.error(err)
      }
    },
    redirectToAuth() {
      goToSpeckleAuthPage()
    },
    async handleStreamSelection(context, stream) {
      context.commit("setCurrentStream", stream)
      context.commit("setTableOptions", { itemsPerPage: 5 })
      context.commit("resetPrevCursors")
      var json = await getStreamCommits(stream.id, 5, null)
      context.commit("setCommits", json.data.stream.commits)
    },
    async getCommits(context, cursor) {
      var json = await getStreamCommits(
        context.state.currentStream.id,
        5,
        cursor
      )
      context.commit("setCommits", json.data.stream.commits)
    },
    clearStreamSelection(context) {
      context.commit("setCurrentStream", null)
      context.commit("setCommits", null)
      context.commit("setTableOptions", null)
      context.commit("resetPrevCursors", [null])
    }
  },
  modules: {}
})- 更新 Home.vue
Home.vue 还需要一些主要的添加,所以我已经突出显示了代码块中的更改,但是就像下面的步骤一样,你可以随时替换整个内容!
我们需要做以下修改:
为包含 v-select 和 v-data-table 的表视图添加一个新的 div:
- v-select 允许选择可用键显示为表列
- v-data-table 完成了所有表 UI 魔术,因此我们不必这样做。
添加几个计算属性:
- commits 和 previousCursors 从我们的商店中获取数据
- availableKeys 和 filteredHeaders 是辅助函数,用于从接收到的提交数据中提取所有可用键,并按照 v-data-table 喜欢的方式格式化标头。
向组件添加新的数据属性:
- options将用于保持表选项同步
- selectedKeys 是我们将保存用户选择的信息以在表中显示为列的地方。 它已经用一些值初始化了。
为options添加监视功能:
- 每次表格选项更改时都会被调用。 这是我们检查是否已请求页面更改的地方,并告诉store在必要时获取新数据。
- 我们还添加了一些 css 魔法来隐藏 itemsPerPage 选择按钮,因为此演示将具有固定的页面大小。
<template lang="html">
  <WelcomeView v-if="!$store.getters.isAuthenticated" />
  <v-container v-else class="home pa-6">
    <stream-search
      @selected="$store.dispatch('handleStreamSelection', $event)"
    />
    <h2 class="pt-6 primary--text">
      <span v-if="selectedStream">
        {{ selectedStream.name }} — {{ selectedStream.id }}
        <v-btn
          outlined
          text
          small
          class="ml-3"
          :href="serverUrl + '/streams/' + selectedStream.id"
        >
          View in server
        </v-btn>
        <v-btn
          outlined
          text
          small
          class="ml-3"
          color="error"
          @click="$store.dispatch('clearStreamSelection')"
        >
          Clear selection
        </v-btn>
      </span>
      <span v-else>
        <em>No stream selected. Find one using the search bar 👆🏼</em>
      </span>
    </h2>

    <div class="pt-6">
      <v-select
        v-model="selectedKeys"
        :items="availableKeys"
        chips
        label="Select data to display"
        multiple
      ></v-select>
      <h3 class="pa-2 primary--text">Stream commits:</h3>
      <v-data-table
        :loading="loading"
        :headers="filteredHeaders"
        :items="commits ? commits.items : []"
        :options.sync="options"
        :server-items-length="commits ? commits.totalCount : null"
        disable-sort
        disable-filtering
        :disable-pagination="loading"
        class="elevation-1"
      ></v-data-table>
    </div>
  </v-container>
</template>

<script>
import StreamSearch from "@/components/StreamSearch"
import WelcomeView from "@/components/WelcomeView"

export default {
  name: "HomeView",
  components: { WelcomeView, StreamSearch },
  data: () => {
    return {
      loading: false,
      options: {
        itemsPerPage: 5
      },
      serverUrl: process.env.VUE_APP_SERVER_URL,
      selectedKeys: ["id", "message", "branchName", "authorName"]
    }
  },
  mounted() {
    var storedOpts = this.$store.state.tableOptions
    if (storedOpts) this.options = storedOpts
  },
  methods: {},
  computed: {
    selectedStream: function() {
      return this.$store.state.currentStream
    },
    previousCursors: function() {
      return this.$store.state.previousCursors || [null]
    },
    commits: function() {
      return this.$store.state.latestCommits
    },
    availableKeys: function() {
      var keys = {}
      this.commits?.items.forEach(obj => {
        Object.keys(obj).forEach(key => {
          if (!keys[key]) {
            keys[key] = true
          }
        })
      })
      return Object.keys(keys)
    },
    filteredHeaders: function() {
      return this.selectedKeys.map(key => {
        return { text: key, value: key }
      })
    }
  },
  watch: {
    options: {
      async handler(val, oldval) {
        this.$store.commit("setTableOptions", val)
        if (oldval.page && val.page != oldval.page) {
          if (val.page > oldval.page) {
            this.loading = true
            var cursor = this.$store.state.latestCommits.cursor
            await this.$store.dispatch("getCommits", cursor)
            this.$store.commit("addCursorToPreviousList", cursor)
            this.loading = false
          } else {
            console.log("page down")
            this.loading = true
            await this.$store.dispatch(
              "getCommits",
              this.previousCursors[val.page - 1]
            )
            this.loading = false
          }
        }
      },
      deep: true
    }
  }
}
</script>

<style lang="scss">
#viewer {
  min-height: 500px;
}

.v-data-footer__select {
  display: none !important;
}
</style>- 预览结果
上面应该涵盖了所有需要的更改! 继续访问 http://localhost:8080。 如果登录,你的应用程序应该看起来像这样👇🏼
7、添加数据持久化
我们的应用程序看起来运行良好,但我们仍然可以做一些小调整来使事情变得更好。 如果出于任何原因,用户重新加载页面,他们将丢失当前的流选择 + 提交结果,这很烦人。 让我们解决这个问题!
值得庆幸的是,我们只需要稍微修改 store/index.js 文件就可以做到这一点。 我们已经安装了 vuex-persist,这个插件将为我们完成所有繁重的工作。
首先,导入 vuex-persist:
import VuexPersistence from "vuex-persist"然后创建一个使用 localStorage 的实例(你需要从 speckleUtils.js 导入 APP_NAME)。 我们还可以使用 sessionStorage,它会在会话结束时被删除。
const vuexLocal = new VuexPersistence({
  storage: window.localStorage,
  key: `${APP_NAME}.vuex`
})
在 Vuex.Store 构造函数配置中添加一个 plugins 属性:
export default new Vuex.Store({
  plugins: [vuexLocal.plugin],
  ...
})
就是这样! 你的应用程序现在应该能够在页面刷新时保持应用程序状态。 🚀
BimAnt翻译整理,转载请标明出处


