
NSDT工具推荐: Three.js AI纹理开发包 - YOLO合成数据生成器 - GLTF/GLB在线编辑 - 3D模型格式在线转换 - 可编程3D场景编辑器 - REVIT导出3D模型插件 - 3D模型语义搜索引擎 - Three.js虚拟轴心开发包 - 3D模型在线减面 - STL模型在线切割
Shap-E 是 OpenAI 开发的突破性模型,它使用文本或图像作为输入生成一系列 3D 对象,以其创新方法改变了 3D 应用领域。 这项非凡的技术可以在 GitHub 上免费获取,允许用户在计算机上无缝运行它,而无需 OpenAI API 密钥或互联网连接。
Shap-E 真正引人注目的是它的多功能性:生成的 3D 对象可以在 Microsoft Paint 3D 等软件中打开,甚至可以转换为 STL 文件以进行 3D 打印。 凭借其独特的功能,Shap-E 正在重新定义我们处理文本到 3D 和图像到 3D 生成的方式,以及由此产生的人工智能应用的创造性可能性。
在本教程中,我们将学习如何在 Google Colab 中创建笔记本、设置和使用 OpenAI 的 Shape-E 模型来生成 3D 模型并使用 Blender Studio 对其进行自定义。
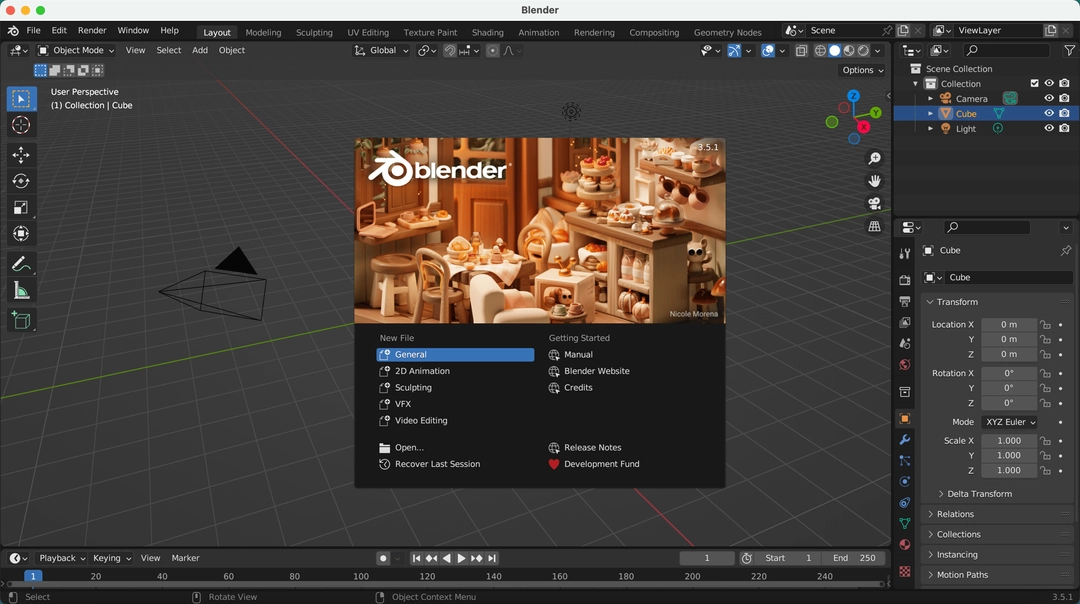
在开始之前,请访问 Blender.org 并下载与你的操作系统兼容的 Blender Studio。
1、设置Colab项目
让我们首先在 Google Colab 中创建新的笔记本。
转到 Google Colab 并创建新笔记本。

2、克隆存储库
现在,我们需要将 Shape 存储库克隆到你的 Google Colab Notebook。
!git clone https://github.com/openai/shap-e进入 shap-e目录并安装依赖包:
%cd shap-e
!pip install -e .
3、实施和烘焙 3D 模型。
添加新的代码单元格 code cell。
在这里我们将导入所有必需的库。
import torch

from shap_e.diffusion.sample import sample_latents
from shap_e.diffusion.gaussian_diffusion import diffusion_from_config
from shap_e.models.download import load_model, load_config
from shap_e.util.notebooks import create_pan_cameras, decode_latent_images, gif_widget
单击“run”按钮或 CMD/CTRL + Enter 运行单个代码单元。
Coooooooooooooooooooool!
添加新的代码单元格。
在这里,我们将设备设置为 cuda(如果可用),否则设置为 cpu。
device = torch.device('cuda' if torch.cuda.is_available() else 'cpu')
单击“run”或 CMD/CTRL + Enter。
添加新的代码单元格。
在这里我们将加载模型和权重。
xm = load_model('transmitter', device=device)
model = load_model('text300M', device=device)
diffusion = diffusion_from_config(load_config('diffusion'))
单击“run”或 CMD/CTRL + Enter。
请耐心等待,加载模型和权重需要一些时间。 对我来说大约需要 5 分钟。 是的,当然这取决于你的互联网连接速度。
添加新的代码单元格。
在这里我们将生成 3D 模型。
batch_size = 1 # this is the size of the models, higher values take longer to generate.
guidance_scale = 15.0 # this is the scale of the guidance, higher values make the model look more like the prompt.
prompt = "a donut" # this is the prompt, you can change this to anything you want.

latents = sample_latents(
    batch_size=batch_size,
    model=model,
    diffusion=diffusion,
    guidance_scale=guidance_scale,
    model_kwargs=dict(texts=[prompt] * batch_size),
    progress=True,
    clip_denoised=True,
    use_fp16=True,
    use_karras=True,
    karras_steps=64,
    sigma_min=1E-3,
    sigma_max=160,
    s_churn=0,
)
单击“run”或 CMD/CTRL + Enter。
生成 3D 模型需要一些时间,具体取决于你的批大小,较高的批大小将需要更长的时间来生成 3D 模型。 对我来说,生成 batch_size=1 的 3D 模型大约需要 22 秒。
添加新的代码单元格。
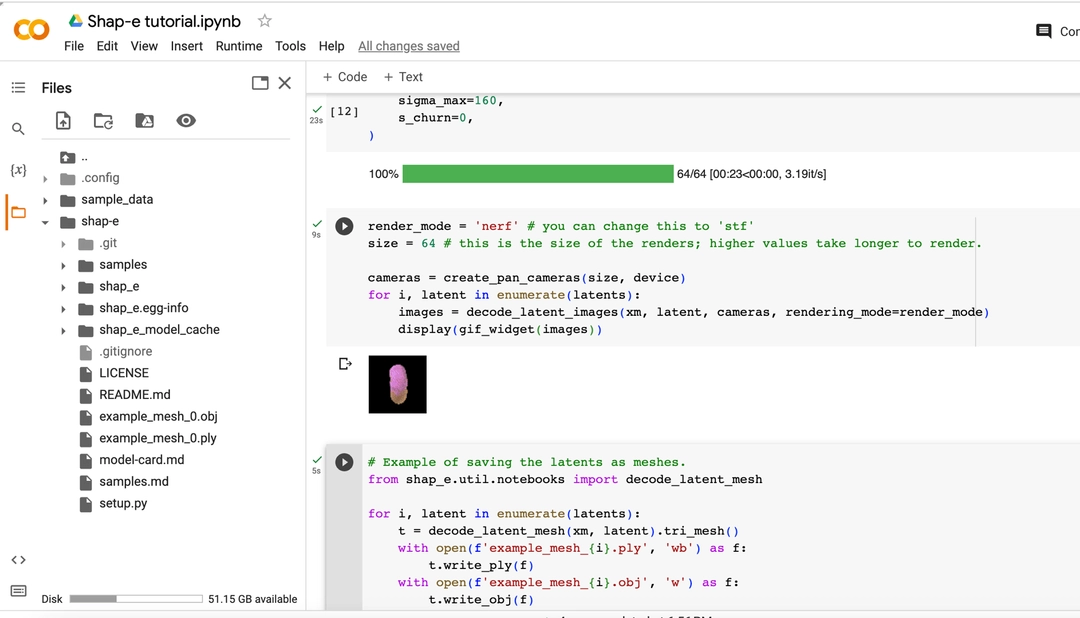
在这里,我们将渲染 3D 模型,使用 render_mode = 'nerf' 神经辐射场 (NeRF) 来渲染 3D 模型。 你可以将其更改为 render_mode = 'stf' 以使用风格传递函数 (STF) 渲染模式渲染 3D 模型。
render_mode = 'nerf' # you can change this to 'stf'
size = 64 # this is the size of the renders, higher values take longer to render.

cameras = create_pan_cameras(size, device)
for i, latent in enumerate(latents):
    images = decode_latent_images(xm, latent, cameras, rendering_mode=render_mode)
    display(gif_widget(images))
单击“run”或 CMD/CTRL + Enter。
你看到模型在旋转吗? 很酷,对吧?
我们继续吧。
添加新的代码单元格。
在这里,我们将 3D 模型保存为 .ply 和 .obj 文件。
注意: .obj,稍后我们将使用它在 Blender Studio 中进行自定义。
# Example of saving the latents as meshes.
from shap_e.util.notebooks import decode_latent_mesh

for i, latent in enumerate(latents):
    t = decode_latent_mesh(xm, latent).tri_mesh()
    with open(f'example_mesh_{i}.ply', 'wb') as f: # this is three-dimensional geometric data of model.
        t.write_ply(f)
    with open(f'example_mesh_{i}.obj', 'w') as f: # we will use this file to customize in Blender Studio later.
        t.write_obj(f)
单击“run”或 CMD/CTRL + Enter。
将选项卡切换到文件并点击刷新。 你将看到 example_mesh_0.ply 和 example_mesh_0.obj 文件。
将 .obj 文件下载到本地计算机。
4、在 Blender Studio 中自定义 3D 模型
打开 Blender Studio 并创建新项目。
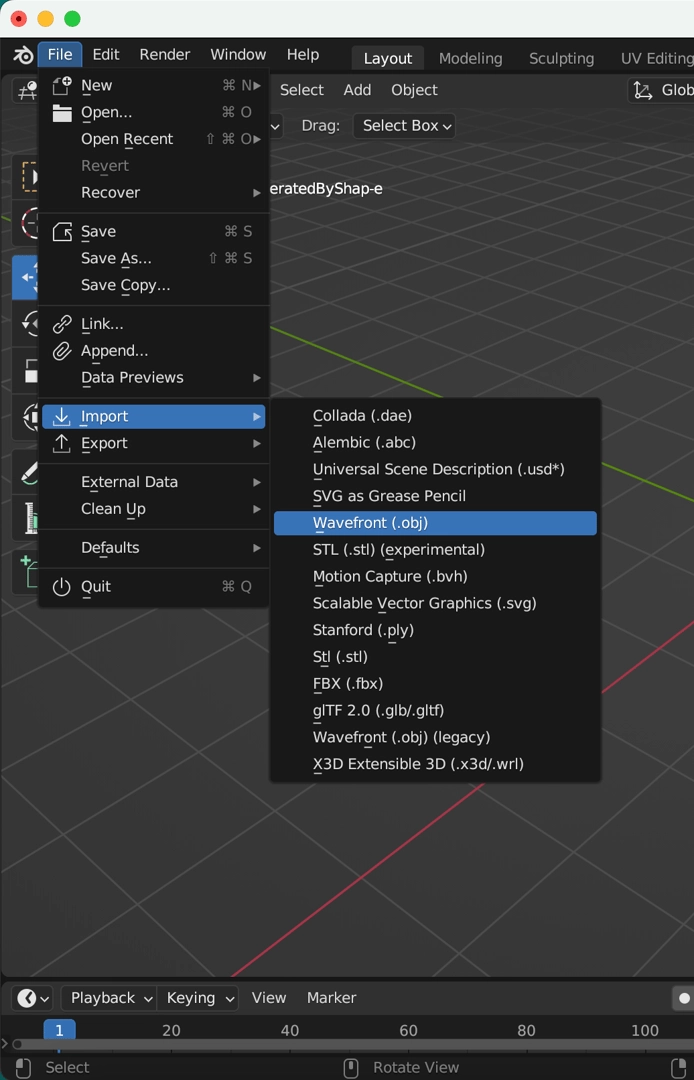
删除默认的立方体。

单击File > Import > Wavefront (.obj)。 选择你从 Google Colab 下载的 .obj 文件。
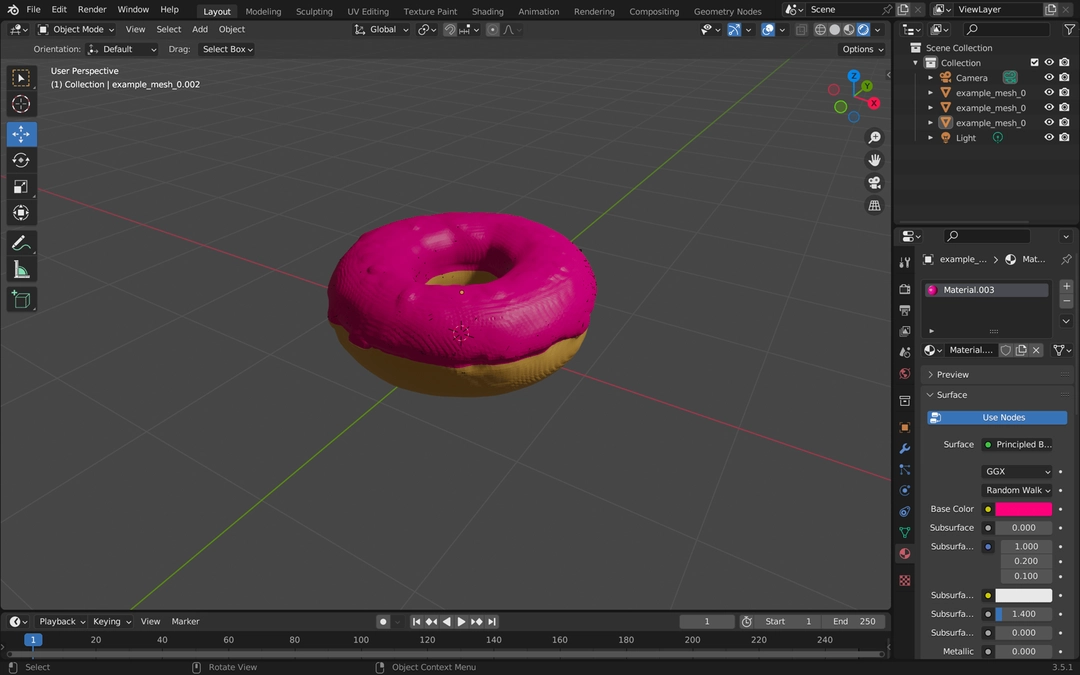
应该在中心看到 3D 模型。
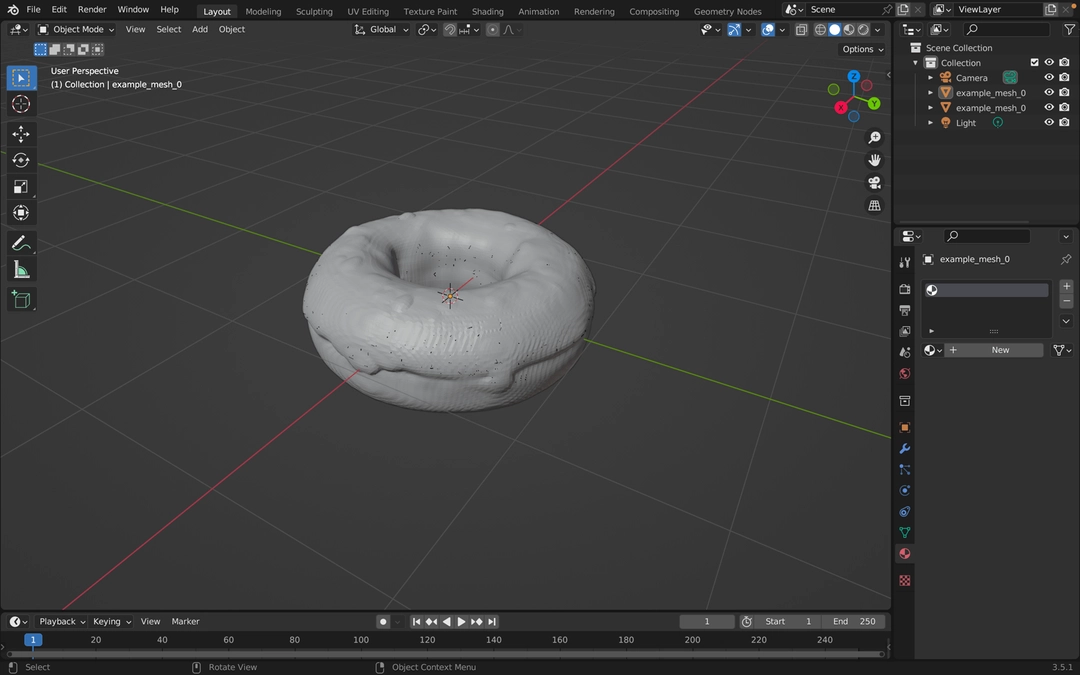
哇!,它本身看起来很酷,不是吗? 顺便说一句,Shap-E 做得很好。
你可以根据需要自定义 3D 模型。
为了演示目的,我简单地将配料涂成粉红色,将甜甜圈涂成棕色。
原文链接:Shape-E Tutorial: how to set up and use Shap-E model
BimAnt翻译整理,转载请标明出处


